The Art Of DIY Framing: My Top 10 Tips For Getting Artwork Up On Your Walls
So many of us, me included, have artwork still sitting in the cardboard tubes or envelopes they came in. Why is that? What's keeping you from framing those pretty prints and letting them brighten up your home. I suspect we all have our individual reasons but I think there will be some common ones. Let’s address them here and see if together we can get our beloved pieces of art hanging on our walls, after all that’s why we bought them in the first place, right?
Tip #1: Framing Failure
That nagging voice whispering ‘what if I mess up? what if I get it wrong?’ But really, how many times have you looked at a piece of art in someone's home and thought ‘well that’s all wrong’. Me neither. The stakes are pretty low here so let’s have fun. Remember there’s no art police. The worst that happens is your artwork hangs a little wonky and besides, anything is better than the current ‘under-the-sofa’ exhibit.
Tip #2: Analysis Paralysis
‘But there’s so many frames to choose from’. Yes there are, so just just pick one and get going. Sounds harsh maybe, but it's just a frame and ‘done is better than none’.
Tip #3: Sizing Shenanigans
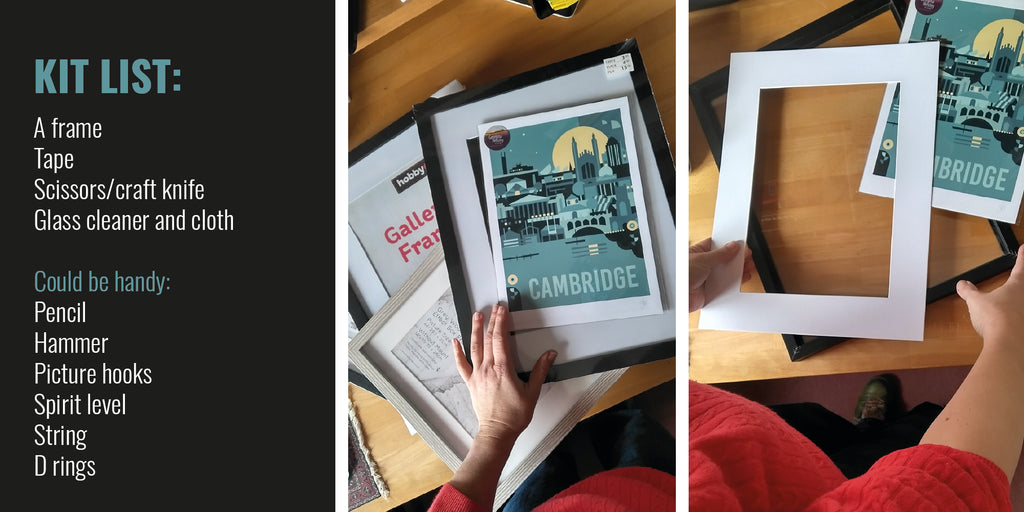
Knowledge is power. Grab a measuring tape, write down the measurements of your artwork in both metric and imperial and keep that note handy.
Many stores stock frames based on standard sizes (A4, A3, A2 etc.). My art prints come in these sizes, making things easier. But remember, some frames and mounts might be a tad off. I carry a sewing tape measure (or a free IKEA paper ruler) to double-check.
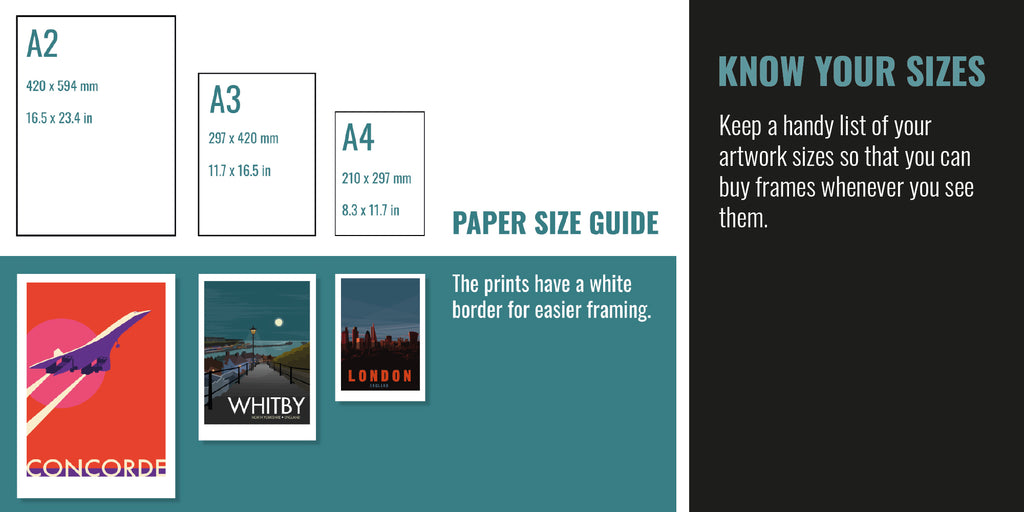
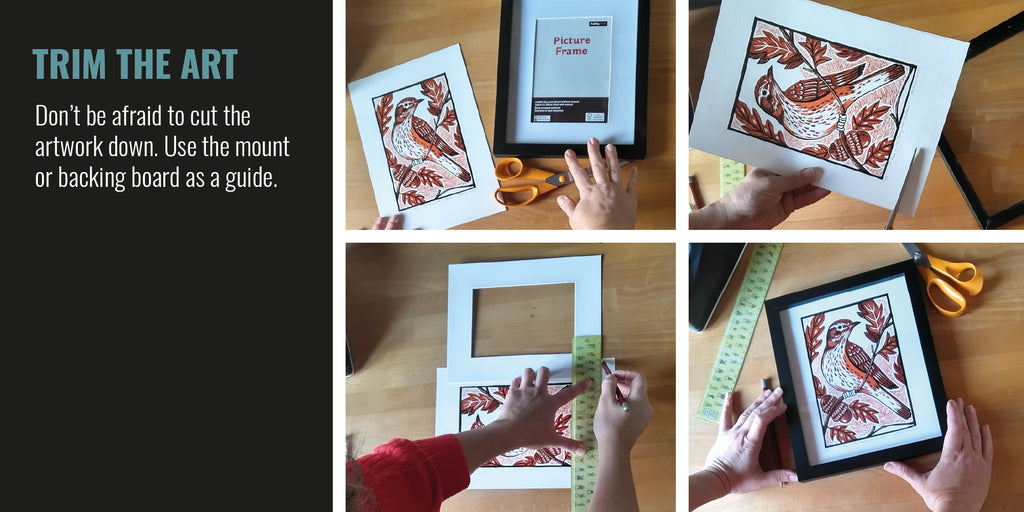
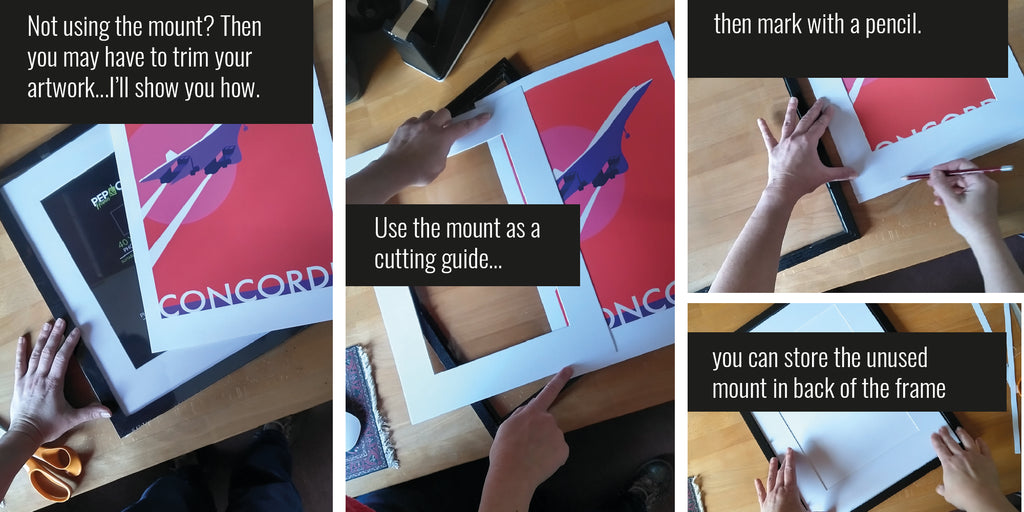
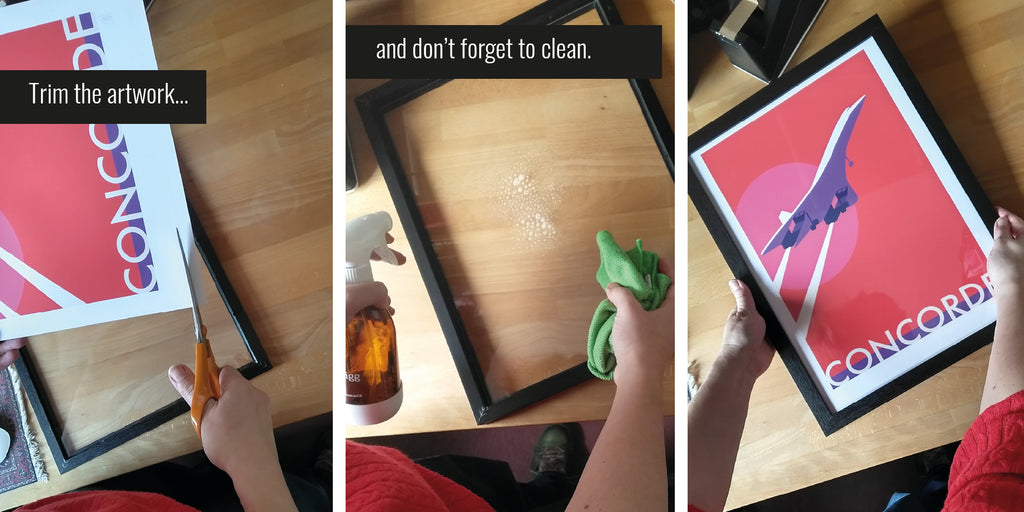
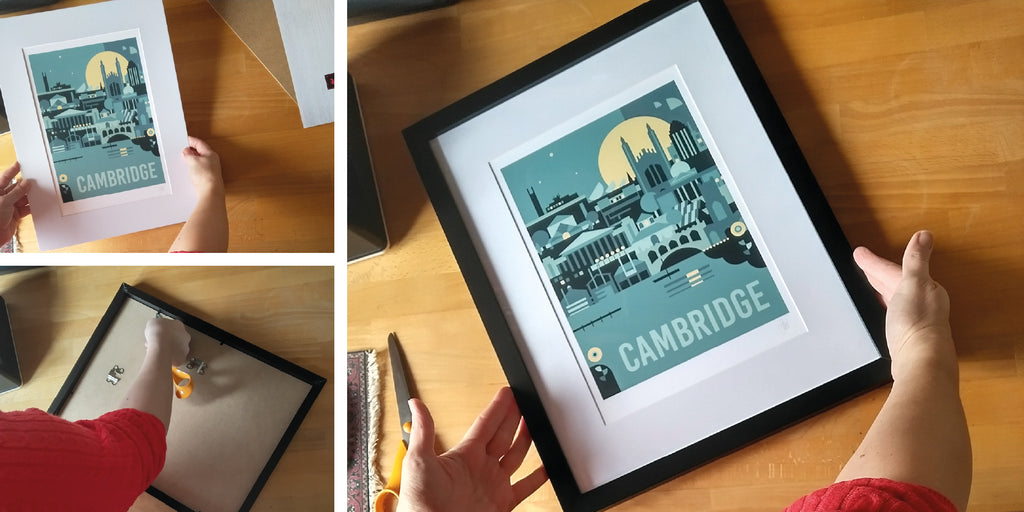
If your art is paper based you can always trim it to fit an existing frame. Who says you can’t cut it down, it’s yours now. My art prints come with a white border, this allows me to hand sign them and also gives my customers a bit of wriggle room when framing.
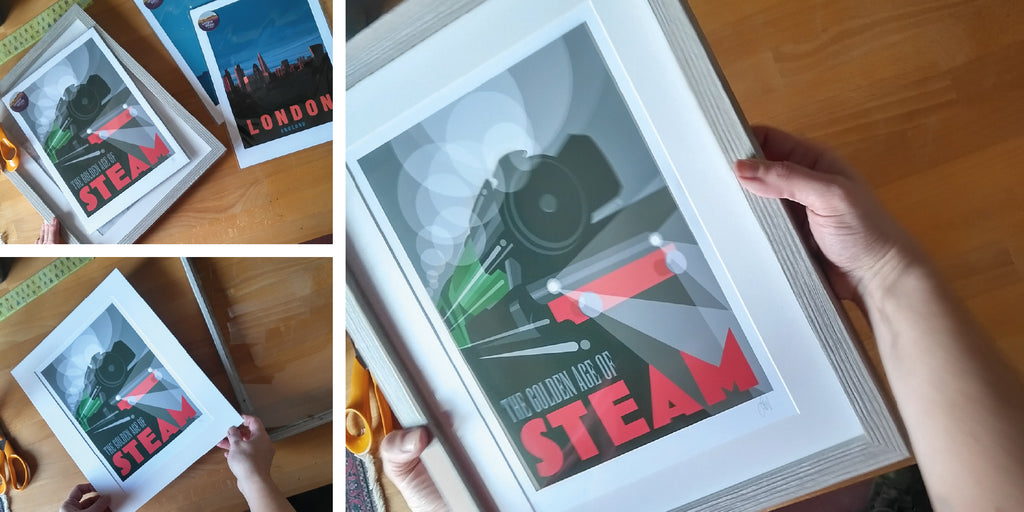
Tip #4:To Mount or Not To Mount?
There's no right or wrong, just personal taste. I love poster-style art unmounted for a cool, theatrical vibe. For signed pieces or more ‘arty’ works, a mount creates breathing space and adds emphasis. But really it just depends on what works for you.
Tip #5 Centring Secrets:
Ever struggle with a wonky mount? Here's my secret weapon: the table trick. Place half the artwork and mount on a table's edge, hanging over. Look up from below to see if it's aligned. A tiny piece of tape holds it in place – flip it over, and voila. (I'll make a video for this, stay tuned!)

Tip #6 Glass vs. Perspex:
Both have their perks. Glass gives a clearer view and is less likely to scratch, but perspex wins on weight and safety (especially online orders). Honestly, sometimes I can't tell the difference!
Tip #7 The Tape Lowdown:
For art-to-mount sticking, Kraft framing tape is my go to. Seal the entire edge – skimping leads to future buckling and daylight peeking through. Light-colored masking tape is another good option but avoid the dark, heavy-duty decorating stuff. Sellotape is also a big no-no – it yellows and crumbles over time. A more professional option is conservation grade ph neutral self adhesive white tape. Obviously this will cost a little more but if you have splashed on the art you may want to make sure it lasts as long as possible.

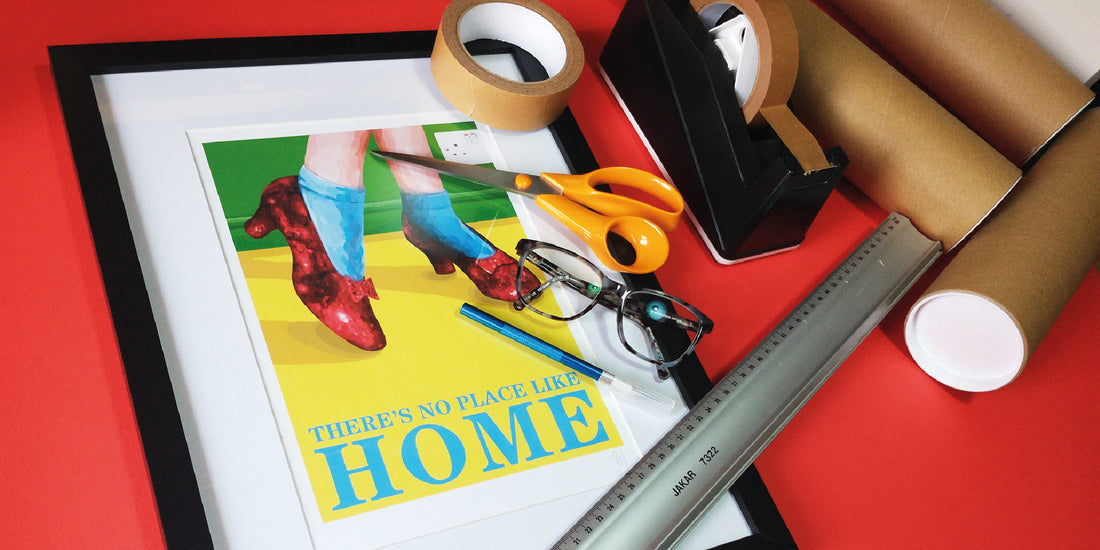
Tip #8 Be Prepared:
Want a house overflowing with art? Prepare for success with a ‘framing kit’ box. Fill it with a hammer, screwdriver, nails, picture hooks, D-rings, string, wire, sticky pads, tape, a pencil, and a small spirit level. This visual reminder keeps you on track to hang your art ASAP.
Tip # 9 Flip the Script:
How about reversing the process. Buy frames you love when you see them and then have fun shopping for art to fit. This way, you'll create a stunning gallery wall in no time.
Tip #10 The Professional Touch:
Don't feel like tackling it yourself? Then take a trip to your local picture framing company. They have all the tools and can handle everything from paper to canvas, even t-shirts and memorabilia. Another option is a bespoke carpenter. They have mad mitring skills and you’ll be supporting local businesses.
So, there you have it. Let's liberate your art from its cardboard prisons and transform your walls into a personal art gallery.
Products featured on this page:
Work by other artists:
My local picture framers and carpenter:
Shop and online retailers: